LivinLife123

Livin Life, one day at a time, and filling you in on the randomness of it all!

Crockpot Chicken and Veggies March 1, 2012

Filed under: Link Ups,Money Saving Meals — Sara @ 7:31 pm
Tags: , ,

This is more of guideline than a recipe but here we go…My Easy Peasy Crockpot Chicken and Veggies

Photobucket

  • 1 whole chicken or bone in chicken pieces – frozen or thawed
  • Fresh veggies – I use potatoes, carrots, and celery…that way the leftovers can be stirred with some noodles the next night for chicken noodle soup…but wait I’m getting ahead of myself…
  • Salt, pepper, whatever spices you like (Fresh rosemary, rubs for the meat, garlic powder, Cajun spices, a dash of liquid smoke…uses your imagination….)
  • ¼ – ½ c liquid….I use water, but chicken broth, wine, anything works
  • 1 crockpot

• Wash you veggies…you never know who scratched their butt, touched the carrots, and put them back on the shelf…and chop them in to chunks.

• Drop your veggies in the bottom of the crockpot, sprinkle with seasoning if you choose
• Pour your liquid in the crockpot
• Season your meat if you so choose and plop it on top of the veggies
• Put the lid on and cook

o Here’s the deal

 Frozen Chicken (whole or pieces) – Cook on high for 6 – 8 hours
 Thawed Chicken (whole or pieces) – Cook on high 4 hours or low for 6 – 8 hours
This isn’t like cooking in the oven, the longer you cook this the juicer it gets…all that happens it the meat will fall off the bone

20120301-131209.jpg
This guy started frozen, was covered in a spice rub, and cooked on high for 6 hours….that’s why he stayed whole, cook him the whole 8 hours and he’ll fall off the bone

Ready for the best part of this beyond simple recipe?? You can change out the chicken for a roast or a pork loin, whatever’s in the fridge or freezer. Don’t have veggies? Throw the meat in the crock pot, rub with bbq sauce, and pour in 1/4 – 1/2 c water and cook for the times as listed above. If you do this you can shred the meat for pulled meat sandwiches or slice and serve….

You want more??

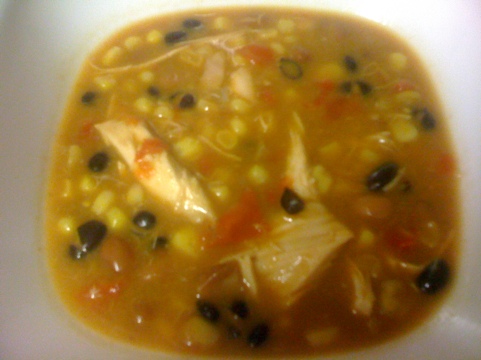
If you make the recipe above and have leftovers turn them into one of these MEALS . Just replace the turkey that the recipe calls for with whatever you’ve got leftover 🙂

You still want more?? You guys are killing me!?!
Go check out all the great recipes here Photobucket and don't forget to link up!


Easy Breakfast Sandwiches February 18, 2012

Filed under: food,Money Saving Meals — Sara @ 1:29 pm
Tags: , , ,

Sausage, Eggs, Bacon, Cheese on an English Muffin

I LOVE Egg McMuffins!! You know the kind you get at McD’s…However, every time I drive thru to pick up food I spend at least $20 for all us to eat. I believe the total yesterday was $23.50?!? Crazy, right? I make killer McMuffins. I guess we can’t call them McMuffins, can we…Well whatever you call them, they are 10x better than any fast food breakfast sandwich, and since you make it you know what’s actually in it..plus I make enough for all 5 of us for under $10…so here is..

1 package of English Muffins (I’ve made these on toast too and they are just as yummy!)

6 eggs – poached (Fried work well too, just not as healthy)

6 slices of cheese

6 sausage patties

1 Lb Bacon

Toast your muffins under the broiler until toasty. Top 1/2 the muffin with some sliced bacon, 1 poached egg, 1 sausage patty, and a slice of cheese. Return to broiler until the cheese starts to melt onto the sausage and egg. Top with other half of muffin, and maybe some grape jelly and enjoy!

Sounds so easy….right….well it is!! You can swap out the meats for Canadian bacon or leftover ham from dinner, if your breakfast is a breakfast on the go or a lunch box breakfast just make sure your eggs are hard poached and wrap the cooked sandwich in foil to keep it warm. Some days I sub poached eggs for fried…it’s all about whatever’s easy that morning…Easy & Yum-O!!

Costs:

1 package of english muffins – $2 (If you use toast it’s even cheaper )
1/2 doz eggs – Under $1
6 slices of cheese – Under $1
6 Sausage Patties $2
1 lb Bacon – $3
Total : about $8.00

There will be lots of bacon left over so you could put in on the side with some sliced fruit and a glass of juice, or I’m always trying to spread things a little further…and 1/2 of leftover bacon makes awesome turkey clubs for the hubs lunch and grilled cheese with bacon for the kids.

A few of you might be saying ‘We’ve seen this before!!’ Well you’re right…remember I told you guys I was moving all my posts to this blog…slowly…either way these are so easy and so good you won’t ever want them from…what’s that place?….I’m sorry these are so good I’ve already forgotten who I borrowed this idea from ;p


National Peanut Butter Day!! January 24, 2012

It’s a !!Celebration!! Not only is it National Peanut Butter Day, which is pretty awesomely amazing as it is, but it YeahWrite41, time to Link-up again!! Double Win! This calls for a drink \_/ *Cheers* \_/…and with that drink how about a cookie, a sandwich maybe, what about brownie bites?

So in honor of National Peanut Butter Day I’m sharing a few of my favorite peanut butter recipes

I’m pretty sure everyone’s heard of recipe where you bake a peanut butter cookie in a mini muffin tin, and as soon as the cookies come out of the oven you pop a peanut butter cup or a mini chocolate kiss in the middle of the warm cookie….Well I have a half assed slacker mom version that’s just as good…yup, that recipe can get even easier…and if you make the Brownie Bites too, you’ll get a 2:1 dessert..Pretty sure that’ll make you the most awesome mom ever!

Peanut Butter Cookie Bites

1c Peanut Butter

1 egg

1 c sugar

1 tsp. vanilla

Mini chocolate kisses or peanut butter cups

Mix the peanut butter, egg, sugar, and vanilla in a medium bowl. Spoon into a [greased or lined] mini muffin tin (filling each about ½-2/3 way full) and bake at 350 for 8-12 minutes, until golden brown. Remove from oven and pop a candy in the middle of each cookie. Let cool for about 10 minutes, then remove from pan and let cool completely on a cooling rack.

And now for the variations on this one:

Peanut Butter Cookie Brownie Bites & a Pan of Brownies
2 Desserts in One!

1 pkg Brownie mix
[Prepared according to pkg instructions but don’t bake]
1 c Peanut Butter
1 c Sugar
1 egg
1 tsp. vanilla

Mix peanut butter, sugar, egg, and vanilla in a bowl. Spray mini muffin tins with non-stick spray and fill 2/3 full of the peanut butter cookie dough, then spoon brownie batter to fill the muffin tins. Bake at 350 for about 20 min. Pour remaining brownie batter into an 8 in round pie pan and bake for about 30 min it until the edges of the brownies start to pull away from the pan.

One More Variation:

For my GF/CF friends (Gluten Free / Cassin Free)

Peanut Butter Cookies

1c Peanut Butter

1 egg

1 c sugar

1 tsp. vanilla

What….is this looking a little familiar so far? Yep…you take the recipe above but just make the cookie….So, we mix the ingredients, spoon onto a lined/greased cookie sheet and bake at 325 for 8-10 minutes. Easiest peanut butter cookies ever! And they don’t taste like many of the GF/CF cookies I’ve tried in the past.

And for another peanut butter recipe…because it wouldn’t be National Peanut Butter Day with only one recipe….

Grilled PB&J

This one is as basic as it sounds, and I don’t know why I didn’t think of it before….

Bread

Peanut Butter

Jelly

Butter

Heat a skillet on the stove over medium-low – a medium heat, while it preheats make your PB&J as you would normally, but butter the outsides of your bread too. Grill until golden brown on both sides, and let cool for a few minutes, then Enjoy!!!….the cooling is important…sticky gooey hot peanut butter can really burn ones tongue…not that I would know from experience….

What you want MORE peanut buttery goodness??? Well know you’re asking a lot….Go grab a stalk of celery, dip it in the peanut butter and you’re good to go ;p

Oh wait….I do have ONE MORE…don’t get too excited…this one’s beyond basic, but it’ll save you a few $$$

Peanut Butter Crackers

A box of saltine crackers, I guess any crackers would work….

Peanut Butter

Smear the peanut butter on a cracker, top with another cracker, and Voila! Those little prepackaged crackers we buy made in 2 seconds for way cheaper, just bag them up and thrown them into your lunch bag.

And there you have it….My National Peanut Butter Day Easy Snack Recipes


***Helloooo!!!! It’s me! I forgot to tell you about one of favorite peanut butter recipes….is it too late to add another?


Take a waffle or pancake and follow the beyond easy recipe (if you can call it that….it really is that simple)  HERE . But add a smear of peanut butter before you add the chocolaty hazelnut spread and the banana.


Oh…and how could I forget?!?!?!

The Peanut  Butter and Marshmallow Sandwich…yup it’s as sugary good as it sounds….

2 slices of bread – 1 smeared with peanut butter, 1 smeared with marshmallow cream, smushed together and enjoyed in a sugary good sandwich

Or, if you want the sugary goodness without the guilty feeling about busting your diet try the

Peanut Butter Nutella Sandwich 

Same easy idea as before [or as a PB&J if you want to get technical about it ;P ]

2 slices of bread – 1 smeared with peanut butter, 1 smeared with Nutella, and smushed together….delish grilled or not


Okay, that’s really all I’ve got…for now at least…I’ll have to dig out the puppy chow recipe for you guys soon, it’s soooooo good!


Pancake Nutella Banana Roll Up January 16, 2012

Filed under: food,Money Saving Meals,Parenting,Uncategorized — Sara @ 12:53 am
Tags: , ,

Need a quick kiddo breakfast or snack? Have leftover pancakes or waffles? What about frozen waffles?

Microwave, or heat them up in the toaster, they need to be warm but soft, not crispy so the microwave works well. Better yet grab a fresh one from the stove….But in this case it’s this mornings leftovers….Smear with a smudge of peanut butter and/or spoonful of Nutella, top with a slice of banana, roll up, and enjoy….I mean hand to the kids to enjoy as an easy (relatively healthy) breakfast / snack to go 🙂

20120115-184501.jpg


Easy Taco Soup January 15, 2012

Filed under: food,Money Saving Meals — Sara @ 2:19 am
Tags: , , ,

Remember the Turkey Taco Soup I told you guys about a few posts backs in 10 Ideas For Your Turkey Leftovers? It’s one of my favorite soups because it’s so versatile. I made it tonight using leftover chicken from last nights dinner….. Never let not having all the ingredients deter you from trying a new recipe. Take this recipe for example, it calls for canned corn, but if you only have fresh use it and add a little extra water. Watching calories? You could easily sub the cheddar cheese soup for chicken broth or tomato juice. Want the cheesy flavor but don’t have canned soup? Make a version of your own, just melt Velveta with some milk. No Rotel? Use a can of diced tomatoes and a jalapeño. Don’t like spicy? Just use the diced tomatoes and skip the pepper. Have fresh tomatoes? Dice them up instead. There are so many easy substitutions you can make when cooking, wether it’s to cut calories, accommodate food allergies, or because you don’t have exactly what the recipe calls for on hand. Playing with a recipe to make it your own is one of the best parts of cooking. So here’s a closer look at my Chicken Taco Soup (notice my can of beans isn’t the size called for, I just added an extra pinch of taco seasonings and no one can tell a difference).

Chicken Taco Soup

1 – 15 oz can black beans
1 – 15 oz can pinto beans
1 – 15 oz can corn
1 – 10 oz can cheddar cheese soup
1 – 10 oz can Rotel (or diced tomatoes if you don’t like spicy)
1 pkg taco seasoning
2 cups cooked chicken (Rotesserie, home cooked, or canned all work well)

20120114-195657.jpg
Mix all ingredients (juices included) in a medium pan over medium low heat and let simmer for about 20 min.

20120114-195916.jpg
Cost: About $8 – And you should get 2-3 meals out a pot of this friending on how you serve it…check out my ideas below

20120114-200025.jpg

*Idea* Serve over rice
*Idea* Top with sprinkle cheese and sour cream.
*Idea* Strain and use as an omelet filling
*Idea* Strain and serve with sprinkle cheese an tortillas, taco style
*Idea* Enjoy as a pipping hot bowl of soup
*Idea* When you get to the bottom of the pot and it doesn’t look like there’s enough to feed everyone, strain what’s left and sprinkle on top of chips and cheese, bake at 350 for 10 minutes and you have nachos


Monkey Bread January 13, 2012

Filed under: Link Ups,Money Saving Meals,Uncategorized — Sara @ 2:17 pm

This week I’m linking up with MammaKat on her Weekly Writers Workshop Link Up.

Prompt 3.) Create an “instructional” post where you show readers how to do something cool or useful or yummy.

I got this recipe from my mom. It is really easy to make and delish!! Awesome for breakfast or as a dessert. I love to make it, slice it, and send it in the kids lunch boxes for school breakfast

Monkey Bread

4 tubes buttermilk biscuits (7.5 oz) [the cheap kind]

1 cup sugar

1 ½ tsp. Cinnamon

1 cup brown sugar (light or dark)

¾ cup butter or margarine

Preheat oven to 350° degrees. Grease bundt pan. Place regular sugar and cinnamon into a large Ziploc bag. Cut biscuits into fourths (use kitchen shears it’ll make your life so much easier!), place in bag and shake covering biscuits with cinnamon and sugar. Place biscuits into bundt pan.

Melt butter and stir into brown sugar on your stove over med-low – medium heat. It will want to separate at first – keep stirring it will mix together. Pour butter/brown sugar mixture over biscuits in bundt pan.

Bake at 350° degrees for 40-45 minutes. Let cool 10 minutes and turn over onto large plate.

And of course, the whole point of my recipe posts is to share yummy recipes that will feed a family of five for under $10.00, so here’s the breakdown:

Cost:

4 tubes of biscuits $2.50

3/4 c. (1 1/2 sticks of butter) $1.50

1c sugar – less than $1

1 c brown sugar – less than $1

1 1/2 tsp of cin – less than $1

Monkey Bread Total – Under $6.00

Add fresh fruit & bacon on the side to make it a more nutritious breakfast

1 pound of bacon -$3.00

Breakfast of Fruit, Bacon, & Monkey Bread – Under $10.00!

If you want to make a 1/2 batch or you don’t have bundt pan no problem. To make a 1/2 batch bake in an 8×8 pan, and if you don’t have a bundt pan you can bake in a 11×7 or 13×9 pan. (Just watch your baking times it may be a little less cooking time, I’d check it around 30-35 minutes)

**This post was originally posted on my Dinner4Five Blog, but as I’ve said in past posts, due to lack of blog traffic and a lack of consistency to post on my part, I’m slowly moving the posts from there to here and adding lots of new posts too


Lunches Made Easy (Easier).. January 6, 2012

Filed under: family,food,kids,Money Saving Meals,Parenting,shopping — Sara @ 8:56 pm
Tags:


Isn’t this too cute?? I thought so too…but yeah I’m not that mom, in fact most days I’m lucky to get everyone out the door on time,with matching shoes and socks, and hair and teeth brushed…So here’s my lunches made easy easier / solution to massive amounts of wasted snack foods in house….

The Problem:

Spills, Spills, and More Spills === Lots of wasted food

Children Who Dump Out Everything  === Lots of wasted food

Snackaholic Little People === Lots of wasted food


Wasted food makes me sick for 2 reasons –

  • Money Doesn’t grow on trees
  • There are so many hungry people out there, I hate throwing a whole bag of food away


Then there’s the mess factor, as if there’s not enough to clean up just having 3 monsters – dumped out, crumbled up food is not a mess I care to add to my normal mom duties. Add in that when I buy groceries they are meant to last a whole a week, for lunches at school, snacks, etc.   Top that off with the fact that  mornings are chaotic around here,  and I was spending an extra 30 minutes bagging up breakfasts, lunches, and snacks x 4.


So I had a plan…


Confession – I actually saw this on an eposide of Wife Swap years ago, laughed at it because it seemed like a time consuming waste, then decided to try it out and it’s working wonders….but getting back  on track…


I bought a weeks’ worth of cereals, snacks, and breakfast goodies, bagged them into individual serving sizes, boxed them up, and stashed the boxes in a top secret hiding place…Okay the top shelf of the pantry buried behind my warehouse club supply of paper towels….Suprisingly enough it didn’t take nearly long as I expected, in fact since I wasn’t still half asleep, like in the mornings, it took no time at all.


Setting up to start


Pre-Bagged Portion Controlled Munchies


So far I’ve cut the hecticness down in the mornings for myself, and the kids can’t find the sancks so they don’t get wasted. Pretty Genius huh?


10 Quick Ideas For Your Turkey Leftovers November 28, 2011

Are your turkey’d out?? I know I am…but here are a few ideas to switch things up so your leftovers don’t taste so leftover anymore….Hope you enjoy 🙂

Turkey Sandwiches –This one’s a given I know, but it’s a classic Thanksgiving Leftover Meal.  Layer stuffing, turkey, and cranberry sauce, and serve on a leftover roll or sliced bread.

Turkey Noodle Soup – There are so many ways to make soup…This is the quickest recipe I have, but if you have a recipe for Chicken Noodle Soup you love just replace the chicken with turkey.

-Chop your carrots and celery and thrown into a pot of chicken or turkey broth

-Add salt, pepper, and seasonings (I use poultry seasoning, garlic and onion powder, and dill)

-Boil until almost tender (about 20 minutes)

-Throw your egg noodles in and boil for another 8-10 minutes

-Stir in leftover turkey and simmer until ready to eat

Turkey Taco Soup

– 1 can black beans
– 1 can pinto beans
– 1 can corn
– 1 can cheddar cheese soup
– 1/2 can water
– 1 can Rotel (or diced tomatoes if you don’t like spicy)
– 1/2 pkg taco seasoning
– 2 cups of leftover chopped turkey

Mix all ingredients (juices included) in a medium pan over medium low heat and let simmer for about 20 min. *Idea* Serve over rice or with sprinkle cheese and sour cream.

Turkey Taco Omelets

This one is one of my favorites….You take the leftover Turkey Taco Soup you’ve already made and strain a few spoonful’s of it…use it as an omelet filling and top with a slice of cheese

-Almost Sheppard’s Pie

Mix the leftover gravy with your leftover veggies and stir in a little bit of leftover turkey meat (It should be kind of runny). Top with a layer of leftover mashed potatoes and sprinkle with paprika. Bake at 350 for about 20-25 minutes, and serve with biscuits or leftover rolls.

-Turkey Pot Pie

Line a pan with a pie crust (optional)

Mix equal parts of sour cream and cream of chicken soup. (When making a whole pie pan I use 8 oz of each, to just make for the hubby and I, I bake in a smaller pan and only use 4 oz of each)

Stir in a can or 2 of mixed veggies (or a bag of **Cooked** frozen veggies), salt, pepper, seasonings, and leftover turkey

Bake at 350 for 35-40 minutes

The last 15 minutes of bake time, throw a pan of biscuits in the oven to cook

When the timer goes off place the biscuits on top of your pie and serve

(I’ve tried baking the biscuits on top of the pot pie but I always end up with soggy biscuit bottoms + this way the kids get biscuits too since they don’t like pot pies)

Turkey ‘Fake’ Nachos

I make my nachos with red nacho cheese Dorito’s  (hence the ‘Fake Nachos’) but tortilla chips work great too. Heat your oven to 350, layer chips on a baking sheet and top with a little sprinkle cheese. Top that with chopped up turkey and whatever nacho toppings you enjoy (or more drained Turkey Taco Soup), sprinkle with another layer of cheese and bake until the cheese is melty, about 10 minutes.

Grilled Cheese and Ramens

Make Turkey Grilled Cheese Sandwiches and serve with Ramen noodles or a bowl of Turkey Noodle Soup

-Turkey Salad

Take your favorite chicken salad recipe and replace the chicken with turkey…Here’s my recipe…

-2-3 cooked potatoes – cut into 1-2 inch cubes (they need to still be HOT)

-½ can of drained peas

-2 cups chopped, leftover turkey

-Chopped dill pickles

-3 hard boiled eggs, chopped

-Mayo (If you use miracle whip leave out the lime juice)

-Dijon Mustard – just a squirt

-Salt, pepper, and the juice from ½ a lime

-Optional – Chopped black olives and/or chopped jalapenos

Mix it all together, chill for a couple of hours, and enjoy

– Turkey Club Quesadillas 

Heat pan over medium heat, and butter two flour tortillas. Place one tortilla (buttered side down) in your skillet and sprinkle with a thin layer of cheese, leftover turkey, and crumbled bacon. Top with a little more sprinkle cheese and the remaining tortilla. Cook about 3 minutes on each side, until golden brown, and serve with ranch dressing for dipping.

* Another option – use the leftover drained Turkey Taco Soup and cheese as your quesadilla fillers, then serve with sour cream and salsa instead of ranch

Hope you guys enjoy my recipes…let me know what your favorite is 🙂


No More Sticky Fingers! It’s Jello Toast November 17, 2011

Filed under: kids,Money Saving Meals,Uncategorized — Sara @ 6:06 pm


I hate sticky…Kids + Jelly = A big sticky mess!!

My mom and grandmother were the same way. So as kids my mom, myself, and now my boys all eat Jello Toast.

You’ll Need:

Bread

Jello Powder

Softened Butter

Turn the broiler on. Butter bread and sprinkle with a layer of Jello powder. Shake off excess powder, place bread on foil, pan, or directly on oven rack. Broil until the Jello powder melts into the butter and the crust starts to brown, about 2-4 minutes…Pretty easy, right? And No Sticky Fingers!!

~Or you can add cinnamon sugar instead of Jello powder for cinnamonny sugar goodness…Either way Yum!
 

Weekly Grocery Trips October 26, 2011

We go grocery shopping, to get stuff to cook, so we don’t have to eat fast food….right? Yet my weekly grocery trip always goes something like this:


I browse the sale ads

I compare them to the giant coupon stash I have

I realize that no matter what’s on sale I will save more at ALDI anyways

I spend half an hour searching for a quarter to get a buggy at the store (I NEVER have change)

I make a half-assed list, hop in the car, and drive to the store

I do my shopping –

  • Load the cart with groceries
  • Unload them on to the conveyor belt
  • Watch like a crazy lady making sure I’m not overcharged for anything
  • Bag my groceries
  • Lug them to the car
  • Load them in the trunk

Then I’m off….To Kroger or Wal-Mart for the few items ALDI didn’t have or that are cheaper due to that stores weekly sales specials + a coupon combo. Once there I repeat the steps above – minus the bagging my own groceries….Now to head home.

I open the overloaded trunk (where half the groceries fall on to the sidewalk…yes, this happens to me regularly…)

Drag the groceries in the house

Put them away (usually to realize I forgot the 1 or 2 items I actually needed at the store)

AND …. After all that, I’m pooped….”Who wants to order pizza?” lol